Wednesday, December 19, 2012

Festive Cookie-Bar/Brownie/Blondie Round-Up . . .


In keeping with the season's seemingly endless baking fest, I thought I'd gather up a nice sampling of bar-cookie/brownie/blondie recipes from past posts to share with you. I'm going to launch into an all-day baking marathon tomorrow and I need to get my ducks in a row. Thought reviewing these recipes might help get me in the mood. It's always wise to have the option of pan-baked items on the agenda along with the inevitable drop cookies, roll-out cookies, refrigerator cookies, and every other kind of cookie bound to make an appearance on the holiday platter. So, without further ado, let's plunge right in with ten favorites from days of yore . . .

Cranberry Snowdrift Bars


Nanaimo Bars


Layered (Hungarian) Apricot Bars


Peanut Butter & Chocolate Cheesecake-Swirl Brownies


Peanut Butter and Jelly Bars


Merry Mocha Streusel Bars


Strawberry Mascarpone Bars


Cream Cheese Blondies with Milk and Dark Chocolate Chips and Honey-roasted Almonds


Okay, I think that ought to keep the baking marathon on track, for a while at least. See you when we both come up for air!


(If you'd like to comment on this post, or to read any existing comments, please click on the purple COMMENTS below.)

Monday, December 17, 2012

Cactus-Pear & Cherry Sorbet . . .


Just last week, I made the personal acquaintance of a cactus pear. Actually, several of them. They were purplish, slightly soft, and a wee bit spiky. I had no choice but to get to know these cactus pears, because they were one component (out of seven different components) that I was forced to confront as part of the "practical final" in my most recently concluded pastry arts class, Plated Desserts II. This final, which I'd been dreading for weeks if not years (undoubtedly since I first heard about it shortly after starting culinary school, ages ago, and witnessed the terror it invariably invoked in the advanced pastry students), required me and my classmates to create a visually striking and tasty dessert within just a couple of hours from start to finish. Not so difficult, you say? Well, consider the fact that a bona fide plated dessert--composed of various textures, temperatures, colors, and flavor types--typically consists of several individual recipes, and the need to combine all the mysterious ingredients into one coherent and comely dessert in that period of time is actually a rather tall order.


The other six ingredients we had to make use of besides cactus pears were unblanched brazil nuts, unpopped popcorn, quinces, cardamom pods, brick dough (also known as feuilles de brick, this is kind of like a tougher and more transparent version of phyllo dough), and coconut sugar.

The fact that I completely forgot to photograph my dessert, once finished, helps illustrate how frazzled I must have been by the time I presented my finished plate to my teacher, a fellow we'll simply refer to here as Chef R. It was not what my husband would describe as "a triumph"--a phrase he often likes to use in reference to especially well-prepared and delicious food. No, it was a partial success and that's all it was. The part of it that was a complete success, was the sorbet portion. That sorbet, which was somewhat similar to today's recipe, was brilliantly pink and made a dramatic impression on the plate. It was zesty, sweet, and tart. It was positively psychedelic.


There was also a cactus pear sauce, equally vivid, neatly dabbed onto the plate like a tiny path, that served as a dividing line between the dessert's two main components. To the left was a perfectly egg-shaped scoop of sorbet (also known as a quenelle), with a delicate golden tuile balanced on top. The sorbet sat on a circle of crumbly streusel that I'd made from a ground combo of toasted brazil-nut brittle and popped, salted popcorn. That sorbet and tuile construction was parked near my attempt at a warm, spicy, stewed quince concoction enclosed within a crisp, baked, brick-dough basket. A cute basket, no doubt, but with sticky, sugary contents that were barely edible. Really. I joke you not. Something went terribly wrong with my stewed quince. The whole thing became gritty and grainy and wasn't at all becoming. And the cardamom in there seemed overwhelming . . . too much cardamom. As I brought my plated creation up to Chef R. at the appointed hour so he could render judgement, I knew I was a girl with a problem.

Chef R. was not impressed with the right side of the plate. Alas.

But, he did say he really liked the sorbet and thought the whole concept, at least in terms of looks, was attractive and appealing. Overall, it could have been worse. I suppose I was just glad all those weeks/months/years of anxious anticipation were over. I'd completed Plated Desserts II and, really, that was reward enough.


It was a tiny consolation, to be honest, that the other members of the class seemed to have a less than complete triumph as well. We all felt, though, that we tried the best we could given the limitations we were forced to work with. And Chef R. was only encouraging in his closing comments to us, as we gathered up our belongings and prepared to offer our fatigued goodbyes. Before we left the room he urged us to keep taking baking/pastry classes even after we complete the formal requirements of the program (I have one more class to go). Because, after all, there is always more to learn. Indeed.


Cactus-Pear and Cherry Sorbet

(For a printable version of this recipe, click here!)

4 very ripe cactus pears
1 pound sweet cherries
12 ounces simple syrup, cooled
1 to 2 tablespoons fresh lime juice
2 teaspoons cherry (or other fruit-flavored) liqueur (I used Heering cherry liqueur; you could use Kirschwasser, or Chambord, or even Limoncello would probably be good.)

Cut the cactus pears in half, lengthwise, and scoop out the pulp with a large spoon. (Be careful; the outside of a cactus pear may have tiny spines left on it that you can't really see.) 

Pit the cherries and cut them in half.

Put the pulp and the cherry pieces into a deep straight-sided container and blend them with an immersion blender until no large chunks remain. Strain the mixture into a medium size bowl. Rinse out the deep straight-sided container. Pour the mixture back into it, along with all of the simple syrup.

Blend the mixture again until all lumps are gone and it looks smooth. Strain the mixture again into a bowl, this time with a fine mesh strainer. You're trying to catch any seeds from the cactus pears; they are very hard and black.

Stir the smaller amount of lime juice, along with the liqueur, into the strained sorbet mix. Taste the mix, and add more lime juice if you prefer. Don't add more liqueur; too much alcohol will make it difficult for the sorbet to firm up in the freezer.

Chill the sorbet mix until extremely cold and churn it in your ice cream freezer according to the manufacturer's directions.

Put the churned sorbet into a chilled container that can be tightly covered and freeze it for at least several hours. I froze mine for over a day before serving it; it needs time to get really firm, and for the flavors to ripen.

Serve in small portions. Nice as a very light dessert, or as a palate cleanser between courses.

(If you'd like to comment on this post, or to read any existing comments, please click on the purple COMMENTS below.)

Thursday, December 13, 2012

Triple Citrus Panettone . . . Fragrant Bread with a Tender Crumb


A few short weeks ago, I was sitting in a dim and cozy restaurant gabbing with my pastry-school pal, Michelle. She'd just handed me about six luscious pounds of thin couverture-chocolate disks that she'd acquired wholesale through one of her mysterious culinary connections. Two big bags of the disks were parked on the table when the waitress came over to greet us. She glanced curiously at the bulging sacks and said, "What's this?"


I think she may have feared we brought our own bag-lunch because, for an instant, she got that wary-waitress gleam in her eye. You know the gleam I mean? Anyway, Michelle, who is smart as a whip and takes no guff from anyone, quipped, "I'm a drug dealer." Then after a pregnant pause she added, "It's chocolate."

The waitress immediately chuckled, smiling in understanding. Chocolate. Of course. We were speaking the universal language.


One of the nicest benefits of attending culinary school has been the opportunity to meet kindred spirits, Michelle being one of them. It was from her that I got the notion to make panettone this Christmas season. (Michelle, you constantly generate good ideas for baking and pastry shenanigans. I love that about you!) 
And, I had another incentive to make panettone this holiday season as well. I received a complementary case of chopped candied fruit a couple of weeks ago from the Paradise Fruit Company of Plant City, Florida. I'm pretty sure I yelped in surprise when I unsealed that cardboard carton only to find all those containers of candied orange peel, lemon peel, citron, and crystallized ginger. I don't know what I thought might be in there, but it wasn't candied fruit.


I opened one of each. They all looked and smelled so fresh. I tried citron first. I'd never tasted citron before, candied or otherwise, and the first thing I noticed is that it's beautifully translucent. Light shines right through.


As I nibbled each variety of fruit, my preconceived candied-fruit notions were blown out of the water. All of the lovely, sticky, little cubes were so bright. The orange- and lemon-peels were so chewy, and the candied ginger was just right--not too peppery, and not at all bitter.


I'm now officially a candied fruit believer, and panettone is the perfect vehicle for quality candied citrus. Many, many thanks to Paradise Fruit for offering me this wonderful sampling. I love it!


About this recipe . . .

The recipe I chose is pretty elementary compared to the more elaborate, old-school panettone versions out there. This is an I-don't-have-all-the-time-in-the-world-but-I-really-want-to-make-panettone formula. Adapted from a recipe in the latest issue of the King Arthur Flour catalog, this citrus panettone begins with a starter that you toss together the night before.

What did I change? Well, the main recipe calls for 1/4 cup of potato flour, but I didn't have that so I substituted 1/2 instant potato flakes; this is a common substitution used in bread recipes, and not to be feared. I didn't have the special flavoring called for (Fiori di Sicilia), so I made my own tiny mixture of vanilla, lemon, orange, and almond extracts. I didn't have one of those traditional paper panettone pans in the correct size (though I drove around metro Detroit looking for them, to no avail!), so I used two high-sided metal cake pans (6" x 3") and they worked out just fine. And, of course, I rewrote the instructions to reflect exactly what I did.

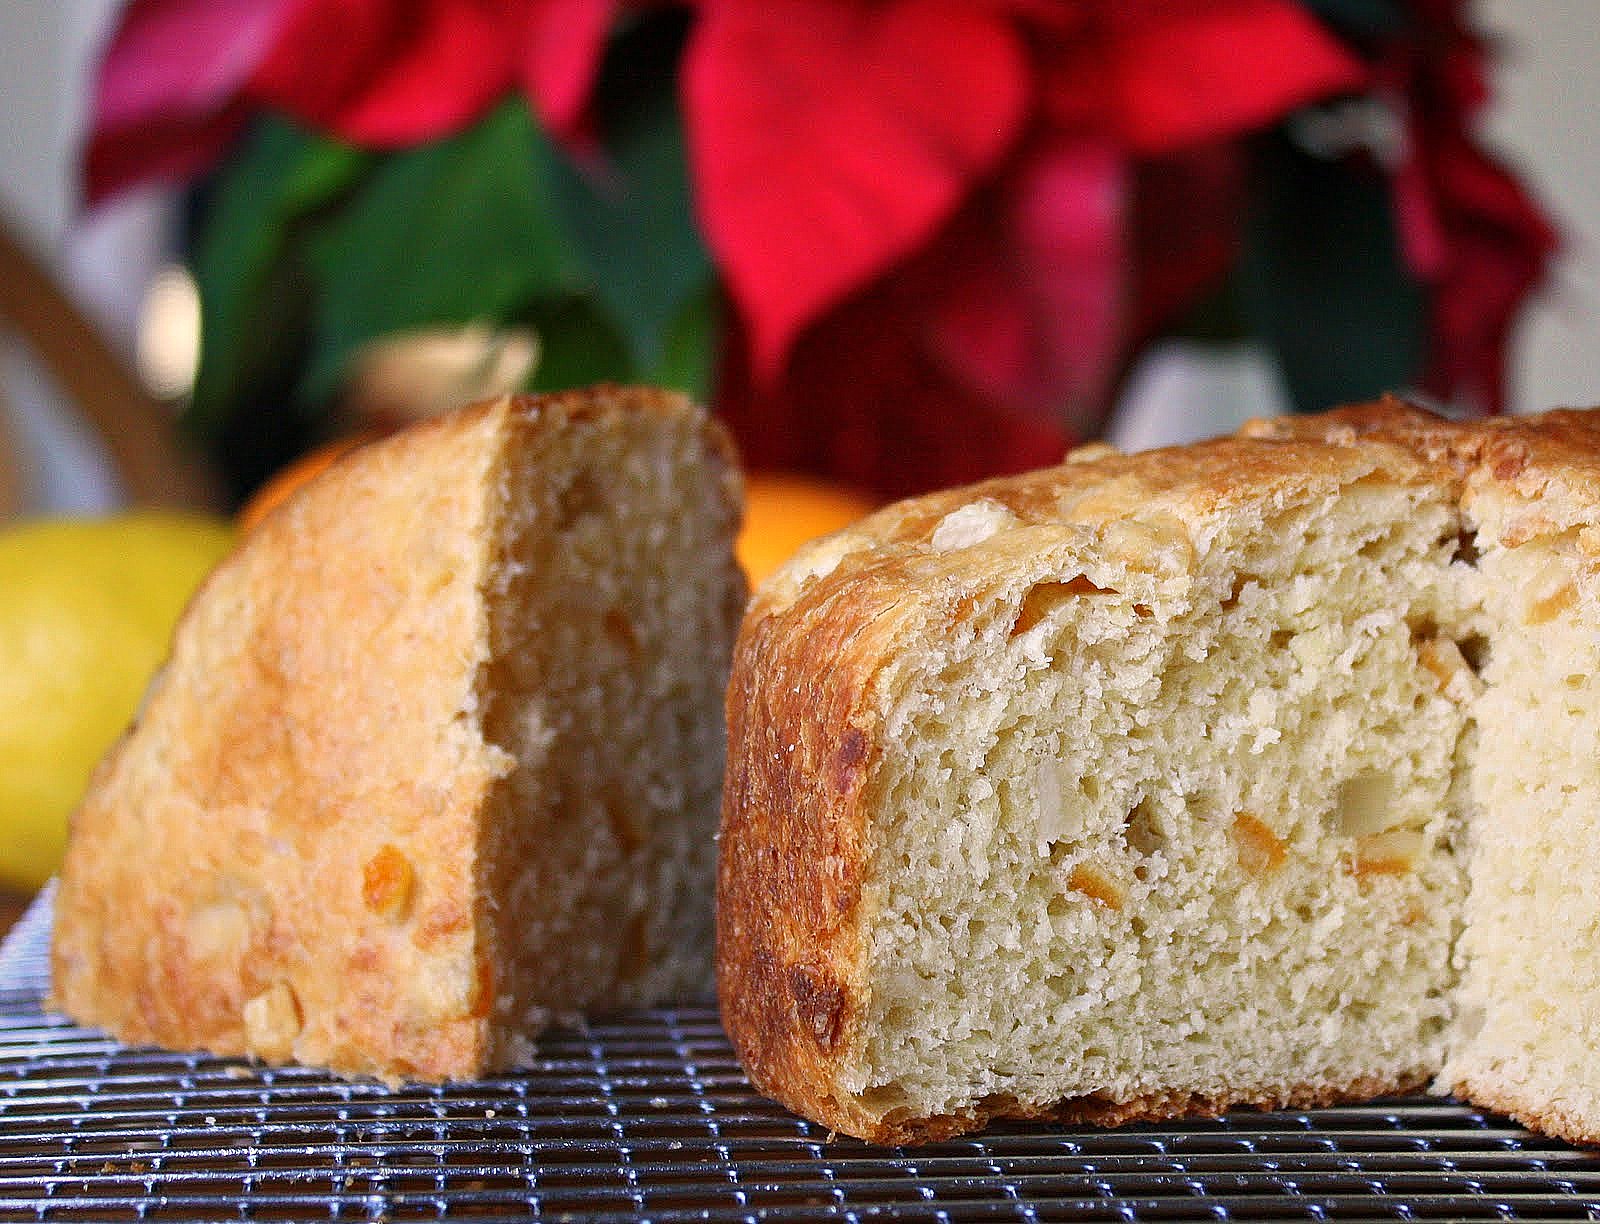
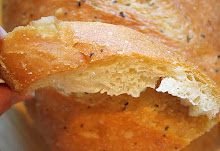
This panettone is slightly sweet with a gloriously tender crumb of the palest yellow. Yum.


Triple Citrus Panettone
(For a printable version of this recipe click here!)

Yield: Two smaller loaves (mine were 4" tall and 6" wide); or one larger loaf

Ingredients for the starter:
1 cup unbleached all-purpose flour
1/16 teaspoon instant yeast
1/2 cup (4 fluid ounces) cool water

Ingredients for the dough:
2 cups (8.5 ounces) unbleached all-purpose flour
1/2 cup instant mashed-potato flakes (I used Hungry Jack brand, natural flavor; alternately, you can use 1/4 of potato flour.)
1/4 cup granulated sugar

1 and 1/4 teaspoons salt (I used fine sea salt.)
2 teaspoons instant yeast

1/4 cup (2 fluid ounces) lukewarm water
2 large eggs, room temperature
6 tablespoons (3 ounces) unsalted butter, room temperature
1/4 teaspoon vanilla extract
A couple drops each of orange extract, lemon extract, and almond extract (enough to equal 1/4    teaspoon total)
1 cup mixture of candied orange peel, lemon peel, and citron, all chopped into very small cubes (I used Paradise Fruit brand; it's already cut to the perfect size.)

Make the starter the night before you make the bread dough:
In a medium-size bowl, combine the flour, yeast, and water. Cover bowl with plastic wrap. Leave at room temperature, undisturbed, until the next morning. The starter will get slightly bubbly.

Make the bread dough:
Measure all of the dry ingredients for the dough into a large bowl; whisk them together lightly.

Add in the wet ingredients (except for the candied fruit; that goes in last) and stir until well combined combine.


Mix in the candied fruit until well distributed.


Mix by hand for a couple of minutes (I easily did this by hand with a dough-whisk; you can use a mixer with the paddle attachment, on low speed, if you prefer) then dump the dough out onto a floured surface and gently knead it for another minute or two. It should be soft and sticky.

Put the dough into a large bowl that's been sprayed with vegetable spray or lightly oiled with vegetable oil.


Cover the bowl with a sprayed/oiled piece of plastic wrap, and top that with a lightweight dish towel. Let the dough rise in a warmer-than-room-temperature spot for up to 90 minutes, until it's almost doubled (don't expect to see dramatic rise).


Turn the risen dough out onto a very lightly floured work surface. Gently deflate it. If you're making two smaller loaves, divide the dough now with a bench knife or sharp chef's knife. Shape the dough pieces into smooth balls and pinch closed any bottom seams.


Place the dough balls into pans that have been well greased with shortening (I used two 3"x 6" metal cake pans), or into paper panettone pans. Cover the pans with sprayed/oiled plastic wrap and top that with the lightweight dish towel.


Put them in a warm spot and let them rise for up to 2 hours, until almost doubled.

Preheat the oven to 375 degrees.


Remove the plastic wrap carefully so as not to deflate the dough and place the pans in the middle of the hot oven (I placed my pans atop a baking sheet to help ensure the bottom of the loaves wouldn't burn).

Bake for 15 minutes, then turn the oven down to 350 degrees. Continue baking for 15 to 20 more minutes, or until the loaves are deep golden all over. If you're baking one large loaf, you may need to bake for 35 minutes longer.

Remove the finished loaves from their pans immediately and cool them completely on a rack before slicing.


(If you'd like to comment on this post, or to read any existing comments, please click on the purple COMMENTS below.)

Wednesday, November 28, 2012

Dark Chocolate Cherry Biscotti . . .


After the spicy, nutty, creamy, buttery, pumpkin-laden extravaganza that comprises the universe of Thanksgiving Day desserts I now find that I'm in the mood for something distinctly crunchy, slightly bittersweet, entirely absent of butter, and far from gooey.


These dark-chocolate cherry biscotti evoke all the best attributes of chocolate-covered cherries, absent the rich fat and cloying sweetness of that iconic candy. They're supremely dunkable if you're a coffee drinker, and they don't mind taking a dip in a glass of milk if you're not.


Surely I don't have to tell you that I briefly considered drizzling the biscotti with melted chocolate, (you know me) but the sense of restraint that invades a baker's psyche the week following Thanksgiving held sway. And it's a good thing it did. I figure, when you take the plunge and coat your biscotti with chocolate, you're committing to the creation of an altogether more indulgent cookie.


Today's treat provides a nice contrast to the extreme richness of last week's feast. Thanksgiving comes but once a year, and we all love it, but once is enough. Thank heaven for that.


About this recipe . . . 

Adapted from pastry chef David Lebovitz's beautiful book, Ready for Dessert, I made a few minor adjustments to his biscotti formula.


I omitted the black pepper (yes, pepper), reduced the amount of solid chocolate by about half, omitted almond extract in favor of vanilla, and soaked my dried cherries in the lusciousness of Chambord, a yummy berry liqueur, versus his suggestion of kirsch/grappa/rum.


Really good biscotti, fellow bakers. I baked the pieces long enough so they'd be very hard and crunchy. Expect lots and lots of lovely little crumbs. And don't forget to dunk.


Dark Chocolate Cherry Biscotti

(For a printable version of this recipe, click here!)

Yield: Two loaves of biscotti, each loaf sliced into about 14 half-inch thick pieces

Spread parchment over two regular size baking sheets, or over one large sheet.
Preheat your oven to 350 degrees.
(No electric mixer needed for this recipe.)

Ingredients: 
2 cups unbleached all-purpose flour
3/4 cup Dutch-process cocoa powder (You don't have to use Dutch, but I think it's the best for something like this; I used Penzeys brand.)
1 teaspoon baking soda
1/4 teaspoon (I used fine sea salt.)
3 large eggs, at room temperature
1 cup granulated sugar
1/2 teaspoon vanilla extract
1/3 cup dark chocolate, chopped small (I used Guittard disks, 60+ percent cacao.) 
3/4 cup dried cherries, cut in half if they're large
2 tablespoons Chambord (or any similar fruity liqueur that you really like)

To brush/sprinkle on the dough before baking:
1 egg, beaten
2 tablespoons sanding/coarse white sugar, or turbinado or Demarara sugar

In a small bowl, drizzle the Chambord over the cherries and let them sit for at least 30 minutes or so at room temperature.

In a medium bowl, sift together the flour, cocoa powder, baking soda, and salt.

In a large bowl, completely whisk together the three large eggs, the granulated sugar, and the vanilla extract.


Into that, gradually add the sifted ingredients. The dough will be very dry and thick. Dump the dried cherries, with all of their liquid, into the bowl. Stir that in. Add in the chocolate pieces and stir to combine as best you can. The dough will be extremely thick and pretty sticky.


Plop all of the dough onto a lightly floured work surface and divide it in half. Lightly flour your hands.


Roll each dough-half into a long log, a few inches shorter than the length of your baking sheet(s);  the dough spreads out quite a bit in all directions when baking. Place each log onto a parchment-covered baking sheet. Dampen your palms with cold water and pat the top of the loaves, gently pressing down so each log is slightly flattened.

Using a pastry brush, liberally coat each loaf with beaten egg; do this twice to each log. Sprinkle sanding/coarse sugar (or whatever kind you've chosen to use) atop the length of each loaf.


Bake the loaves for 25 minutes in a 350 degree oven, reversing the pan(s) in the oven halfway through the baking time. Remove them from the oven; lower the oven temperature to 300 degrees. Leaving the loaves on the baking sheets, let them cool for up to 15 minutes.

Move the loaves, still on their parchment, to a cutting surface. Using a serrated knife (ideally, a very sharp bread knife), cut each loaf on the diagonal into slices that are about 1/2" thick (I think mine were actually a little thicker than that).


Lay all of the biscotti pieces, cut sides down, back onto parchment-covered baking sheets.


Continue to bake for 20 to 30 minutes, flipping the pieces over halfway through, and reversing the direction of the baking sheet(s) in the oven. If you want the cookies to be really hard and crunchy, bake them for the maximum amount of time, and check to see that they're pretty firm before you take them out of the oven.


When they're done, let them cool completely on the baking sheets. Store them well covered. They'll be good for about a week. (And, of course, if you're dying to dip them in melted chocolate, well, follow your dream!)

(If you'd like to comment on this post, or to read any existing comments, please click on the purple COMMENTS below.)