

Days like that call for recipes exactly like this one. It's guaranteed not to wake the neighborhood. All you really need for it, once you've measured the ingredients, is two big bowls, a spoon and spatula, a bench scraper or sharp knife, and a good work surface for kneading. That's basically it. Oh, and you'll definitely need your own capable hands because they, my baking friends, are the most critical component. And, thankfully, they're quiet.
Now let's talk about the word "rustic" for a minute. The dictionary defines it in a variety of ways. "Characteristic of, or resembling, country people," "made of rough limbs or trees," and my own personal favorite, "lacking in social graces or polish." I think that last one applies pretty safely here without causing offense. After all, this bread is mixed by hand, shaped by hand, and it'll accept a few customizing tweaks without having a high falutin' hissy fit. It knows it's naturally good, and doesn't have to try too hard.

You can easily whip up a couple of these loaves without feeling afterward like you've just run a race or been on a bad job interview. You know how some recipes kind of make you feel like that? Where you can just tell, about halfway in, that things are not gonna turn out well? With this bread, you don't have to worry. It won't let you down. So slide your dough into the oven and prepare for happiness. Maybe even full-blown joy! At the very least, expect to experience a sense of peaceful contentment in your bread baking powers. And don't forget to enjoy the quiet while it lasts.
About this recipe . . .
Adapted from The Farm Wife blog's formula for "Country White Bread," these loaves can be made panned or unpanned, and will accept modest alterations pretty well. I added in, with the bread flour, a little bit of flax meal, along with a smidgen of wheat bran and wheat germ, to give it a little more character and substance. But I've also made it entirely with white flour, too, and that's a great loaf also.
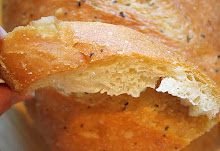
I love bread that doesn't need to bake in a pan, don't you? I baked these on a stone, but you can certainly bake them atop parchment on a baking sheet.

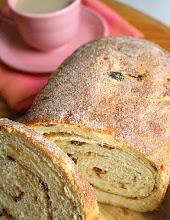
Rustic Country Bread
(For a printable version of this recipe, click here!)
Yield: Two standard size round loaves
1 and 1/2 cups very warm water (about 120 degrees or so)
1/2 cup milk (I used 2 percent.)
2 tablespoons granulated sugar
2 teaspoons salt (I used coarse kosher salt.)
3 and 1/4 teaspoons instant yeast (I almost always use this kind of instant yeast, which requires no proofing; if you want to use active dry yeast instead you'll need two standard size packets, and you'll want to proof them first in a bit of the warm water before adding that into the bowl.)
6 cups bread flour, and possibly a little more for flouring your work surface
1 and 1/2 tablespoons flax meal
1 tablespoon wheat bran
1 and 1/2 teaspoons wheat germ
2 tablespoons of unsalted butter, softened to room temperature
2 large eggs, lightly beaten
In a large bowl, lightly whisk together the sugar, salt, instant yeast, three cups of the bread flour (only three), the flax meal, wheat bran, and wheat germ. Add the water and milk into this, stirring until very well blended.

Add in the butter and eggs, and stir until fully combined.

Now, gradually add in about two and one half cups more flour, stirring until the dough looks like a rough shaggy mass that pulls away from the sides of the bowl.

Scrape the bowl and dump the dough out onto a well floured work surface. (Also flour your hands well, and keep a handful of extra flour nearby for this purpose.)

Knead the dough until it feels smooth and elastic, working in the final 1/2 cup of flour as you do so; this may take at least five minutes of steady kneading, more or less.

Use oil, vegetable spray, or shortening to completely coat the inside of another large bowl. Put your dough into it, turning it over once so it's coated all over. Grease/spray etc. one side of a sheet of plastic wrap and use it to cover the bowl, greased side down. Place the bowl in a warm spot and let the dough rise until it has doubled; that should happen within an hour (mine took barely 40 minutes on a hot day).


Press your fist into the risen dough, here and there, a couple of times to deflate it. Turn the deflated dough over in the bowl and cover it again with the greased plastic wrap.
Again, let it rise until doubled. And, again, this may take up to an hour depending on how warm your house is. When the dough has doubled, dump it out onto your work surface (only very lightly floured this time) and cut it into two equal parts using your bench scraper or a sharp chef's knife.

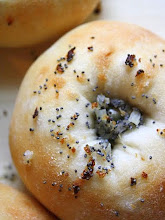
Shape each of the two halves into a shallow round, making sure to tightly pinch closed any seams. Sprinkle a very thin layer of cornmeal (or you can use a little flour) onto a couple of parchment sheets. Set the dough rounds on the cornmeal. Cover the dough with greased plastic wrap and let them proof (aka have their final rise) until about doubled. This might take half an hour.

If you're going to bake the bread on metal baking sheets, preheat the oven to 400 degrees for at least 20 minutes.
If you're using a ceramic baking stone, preheat the oven to 475 for at least half an hour so the stone can get really hot, then turn the oven down to 400 immediately upon placing the dough into the oven.
If you are using metal sheets, you can just slide the dough, still on its paper, right onto them when you're ready to bake. If you're going to bake on a preheated baking stone, you can still give the dough its final proof on cornmeal over parchment, but then gently move the proofed loaves onto a cornmeal-dusted baker's peel to transfer them to the hot stone (that's what I did).
Before putting the dough into the oven, use a little misting bottle of water (or, if no misting bottle, you can do this by wetting your hands and then gently patting the loaves) to moisten the top of the loaves. This will help prevent the loaves from bursting open as they bake. Also, it's a very good idea to squirt misty water quickly into the oven upon placing the dough in there, creating a nice steamy atmosphere (just don't aim right for the oven light).
Bake the loaves for about 20 to 25 minutes or so, until they're quite golden brown on the top and bottom. (The internal temperature of the loaves should be at least 190 when they're done; if you want to, you can stick a stem thermometer in the bottom of each loaf if you like. Under-baked bread will be noticeably dense/gummy inside, and just feel heavier when you handle it right out of the oven.)
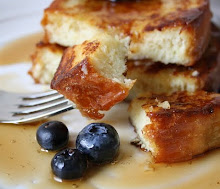
Let the loaves cool on a rack for at least half an hour before slicing. Great for sandwiches, toast, french toast, you name it. Freezes well.

(If you'd like to comment on this post, or to read any existing comments, please click on the purple COMMENTS below.)


